
Affiliate marketing is definitely a lucrative way to make money online.
If you don’t have your own product to sell (at least, not yet), then affiliate marketing is a quicker and easier route to take to make money online.
Once you have your affiliate funnel in place, you can get the ball rolling and start earning money on your commissions.
Don’t know how to start? No worries…
Today, you’ll learn how to set up an affiliate marketing funnel in minutes with Clickfunnels that’s so simple, anyone can do it!
Plus, it will help you get more opt-ins and sales… which is what you’ll need to build your email list and earn enough cash to fund your Facebook ads!
This is going to be a right-over-my-shoulder, walk-through, step-by-step guide on how to create your funnel using Clickfunnels.
[responsive_video type=’youtube’ hide_related=’1′ hide_logo=’0′ hide_controls=’0′ hide_title=’1′ hide_fullscreen=’0′ autoplay=’0′]https://www.youtube.com/watch?v=4IsMN8igQdU[/responsive_video]
Everything you’ll see here is as thorough as it can get, so you have no excuses!
So let’s get your hands dirty and jump right in.
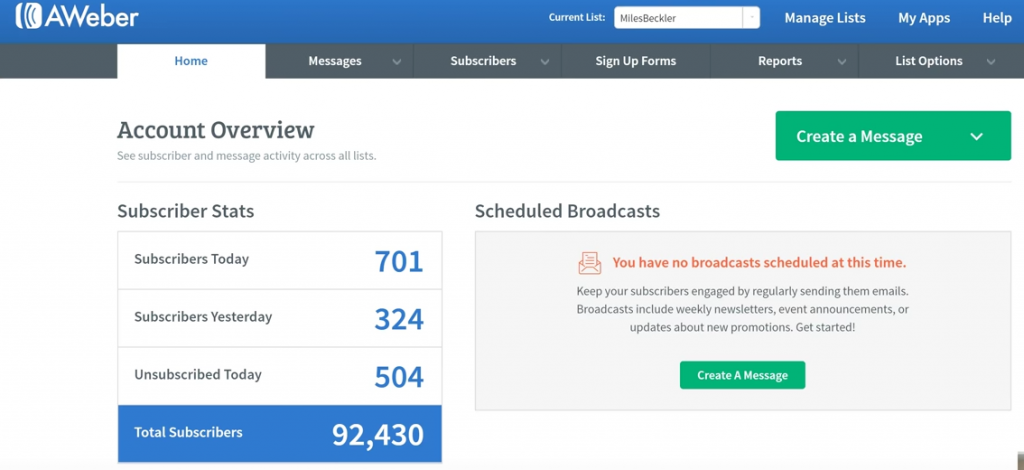
Create A Free Aweber Account And Start Your Email List
The first step to this process is to set up your email list.
This is crucially important!
Why? Because the main point of this funnel will be to build up your email list so that you can build up trust with your list members and direct-market to them later.
So the first step is to actually sign up for Aweber and create your email list.
Then, you will want to follow the steps outlined below to link that list to your funnel.
Here’s how it works.
Create Your Email List
1. Go to Aweber and set up your email list.
2. Go to “Manage List,” then click “Create a List.”
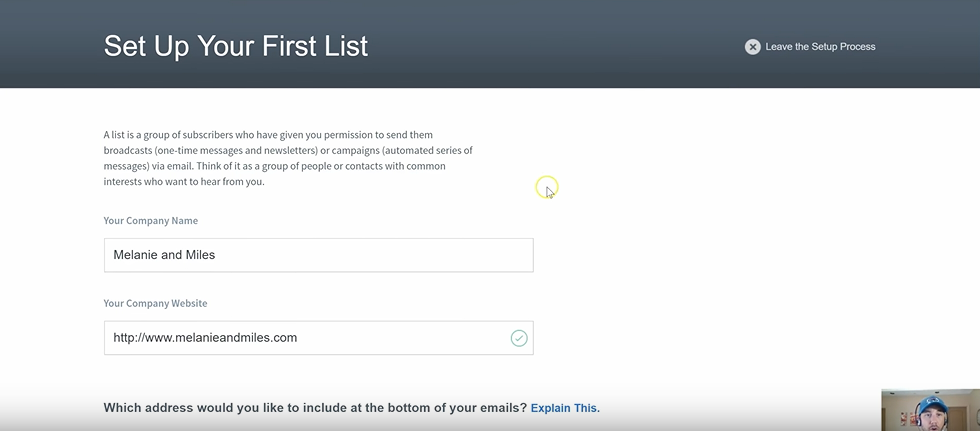
3. Set up a list. For this example, I will put “Diabetes Cure” as the name of my new list.
4. Fill in the required information:
- Company name
- Website
- Mailing address
You need to have an actual email address for this, so put in your real email.
Real Name or Some Cool Alias?
When creating a list, you should use your actual name. You don’t want to use email@ or info@.
Why?
Because it gets worse deliverability than a real person’s name. You also want the email to match the domain you entered in the form.
Add a Description to Your List
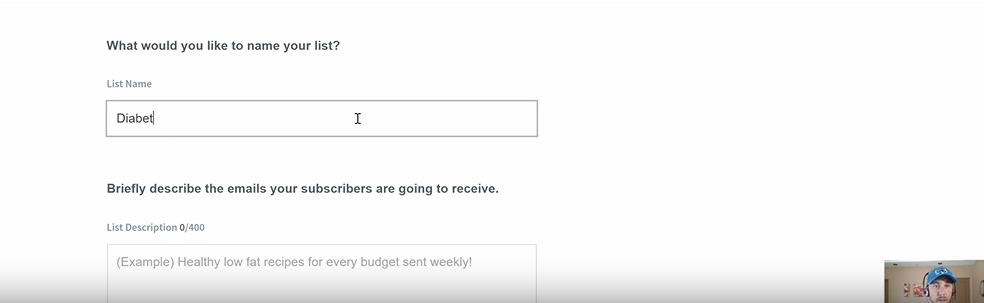
Very important reminder – people on your list can see this when they unsubscribe.
So you don’t want to put words like, “prospects who didn’t buy” or something similar, because it might offend them.
A safe thing to write for this page is a simple, vague description, such as “email list for the Diabetes Cure.”
Then you click the “Next” button, which will take you to the “Approve Your Confirmation Message” page.
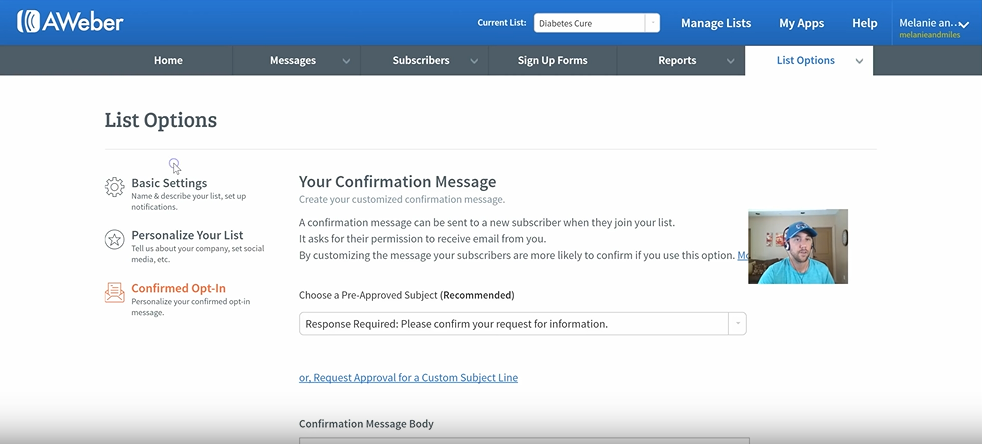
Create a Confirmation Message
Next, you need to set up a confirmation message for your email list. This is basically an email sent to new subscribers when they join your list.
It essentially asks their permission to receive emails from you.
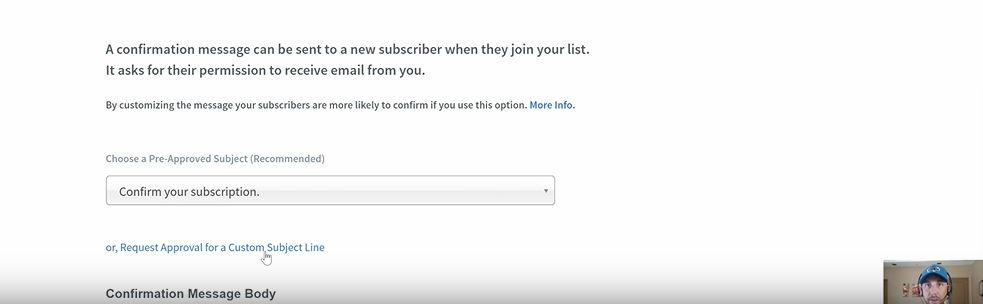
There is also a drop-down menu, which says “Choose a pre-approved subject (recommended).”
When you open up the drop-down menu, it will look like this…
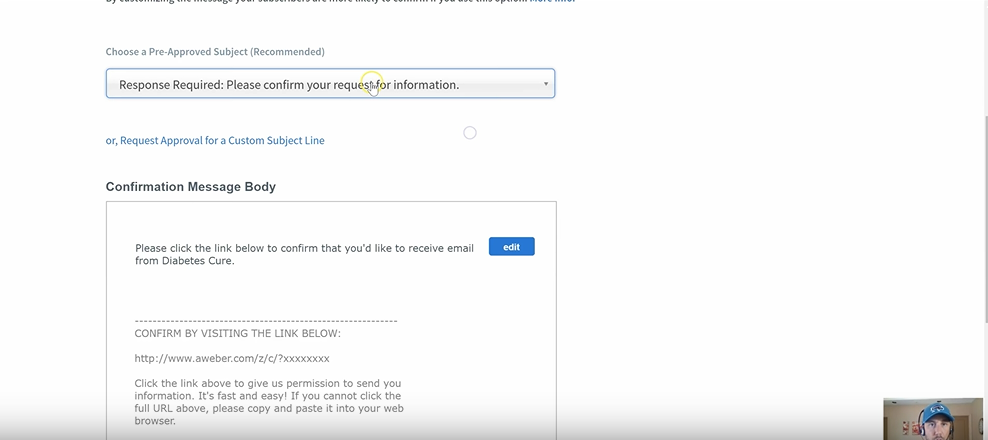
In this example, I went ahead and chose the option “Response Required: Please confirm your request for information.”
Next, you will see the “Confirmation Message Body” section, located below the drop-down menu you just opened. You can click “Edit” on this section to type in your own Confirmation Message.
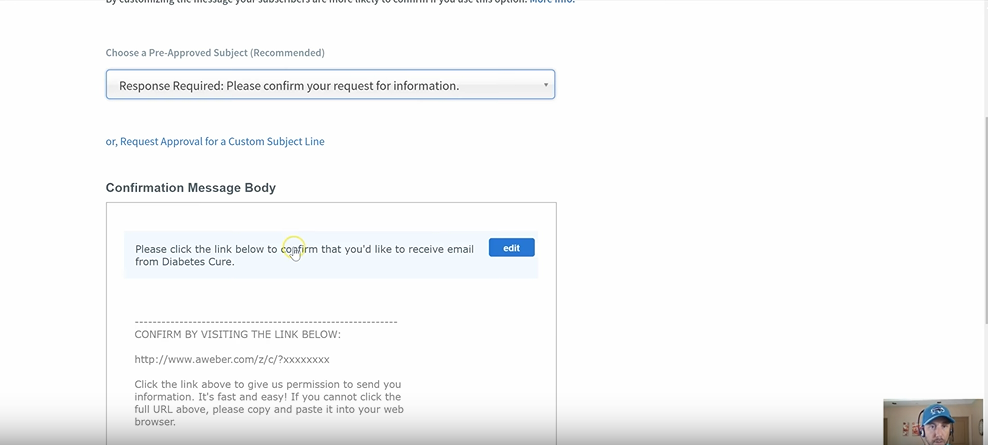
There’s a pre-made sample confirmation on Aweber but…
I would tweak that and put something like:
“Thanks for your interest in the video because that’s what we’re going to be giving away all through our offer. Please confirm by clicking the link below. I can send you a copy of the video and the other tips and tricks I have, etc…”.
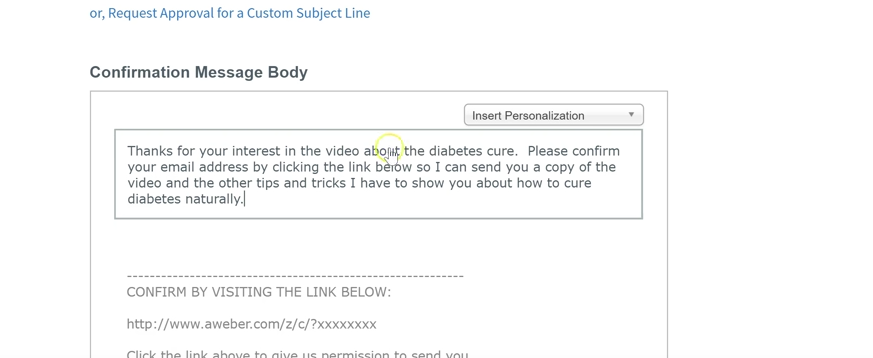
Better than a one-liner for sure!
Feel free to copy my example and add something more specific for your product.
Once you’re happy with what you put on there, hit the “Approve Message & Create List” button and BOOM. You have your list all set up.
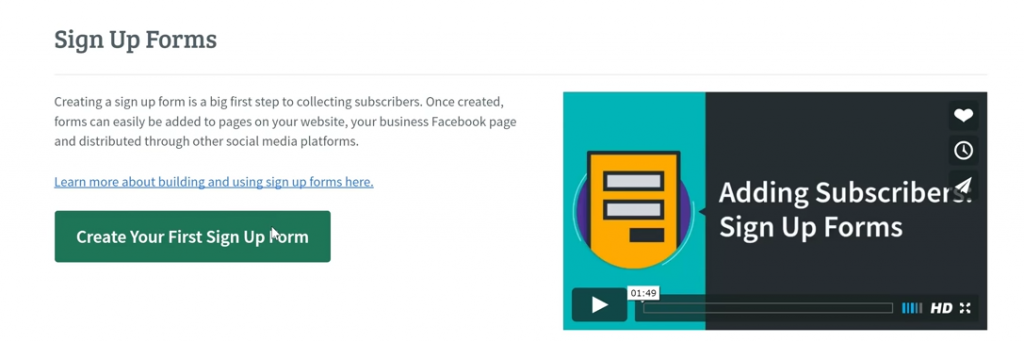
How to Create a Basic Signup Form
Next up, you need to get your signup form up and running.
1. On your Aweber dashboard, click “Sign-up Forms.” Once you get there, click “Create Your First Signup Form.”
You will want to make sure that the correct “Current List” is chosen when you do this. You can see that right above the “Sign Up Forms” menu tab button.
The next screen you come to will be the “Design” page.
But for now, you can just let this be super-basic… so scroll down to the bottom of this page, and then click “Save Your Form.”
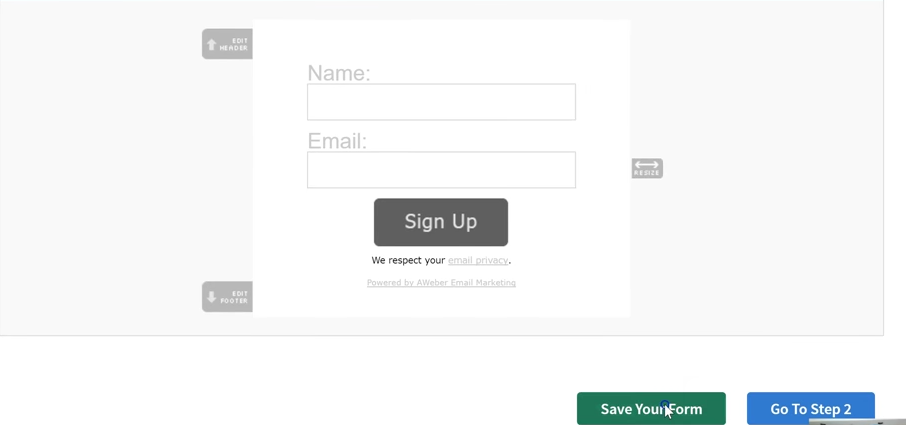
Then, after the screen loads, scroll back down to the bottom of the page and click on the “Go To Step 2” button.

This will take you to the “Settings” section.
2. On the settings page, enter your list name. Mine, in this example, was “Diabetes Cure.”
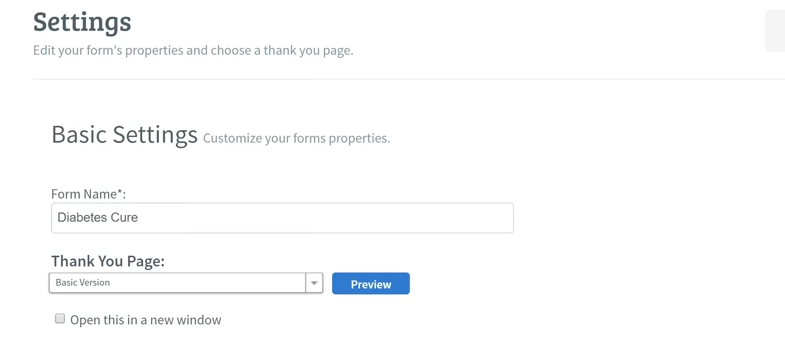
Now, there is a section on this page called the “Thank You Page” section. You can see it here.
You will need to go back to the “Thank You Page” section and add the proper Thank You Page URL from Clickfunnels once you get it. But for now, you can move on.
3. Save the form, and you’re done. Your signup form is ready!
Create Killer Copy that Sells!
The best way to get sales and opt-ins is to grab audience attention with killer sales copy.
But you don’t have to create this from scratch.
Here’s my smart hack on how to get great copy literally in seconds that you’ll use within your affiliate funnel.
Get Your Copy on Clickbank
The next website that you will need to visit is ClickBank.
You will want to go to ClickBank at this point because you will want to grab the sales copy that you’ll be using within your funnel.
Here are some step-by-step instructions on how to do that.
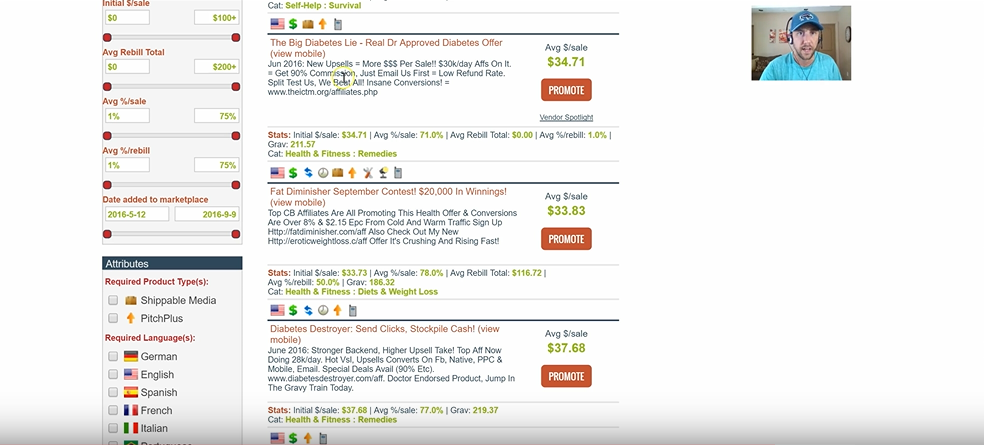
1. Go to clickbank. You will need to create an account of course. But once you do that, you will want to go to the “Affiliate Marketplace.”
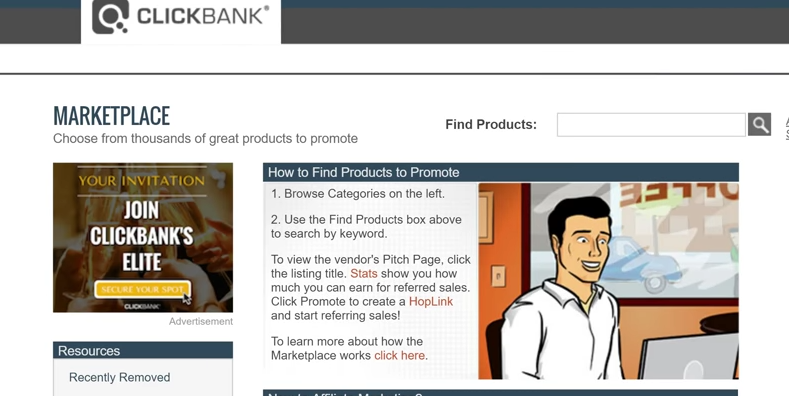
Once within this marketplace, you can start to search for a product that you’d want to promote for your niche.
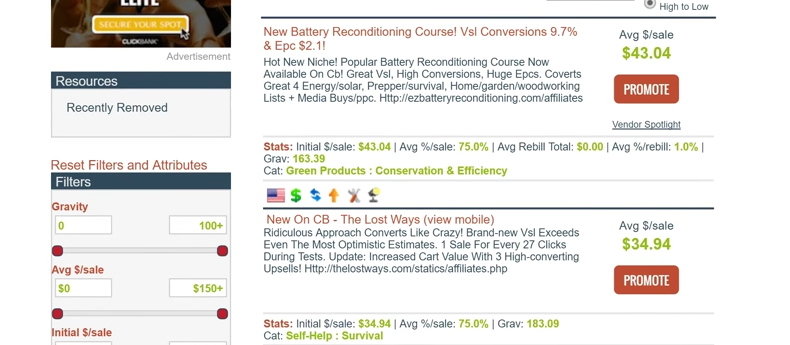
2. Click on the product that you would like to promote.

Quick Tip on How to Find Great Copy
Choose a product with a compelling story that really pulls people in.
Once you’ve found the right one, check to see if it’s got a video or a text narrative. You’re better off with a text copy, so you can easily grab it and use it for your opt-in page.
If a particular product doesn’t have any text and/or video, you would need to create those yourself… because you will really want to have both to make this funnel work.
So keep that in mind as you search for products.
3. Copy the hook or the big idea. You will use this to really grab attention on the front-end of your funnel.
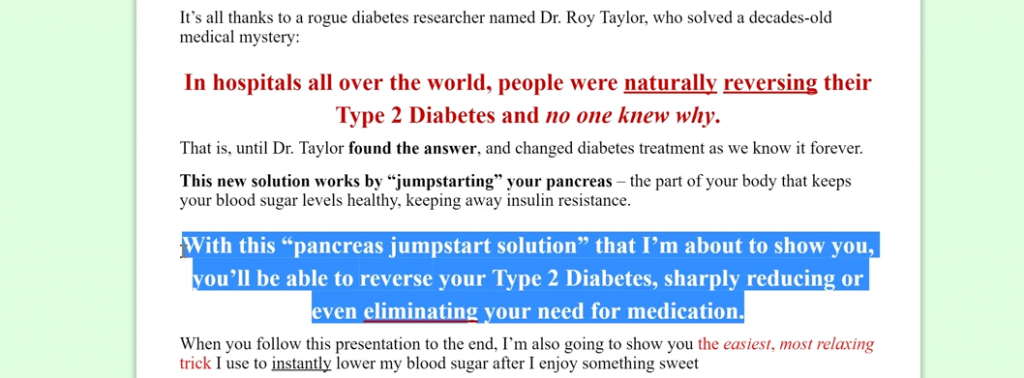
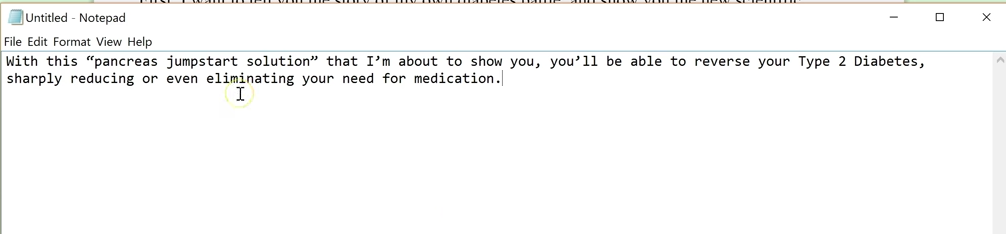
4. Paste the hook into a notepad and rework it. Capitalize the first letter of each word since this will be your headline.
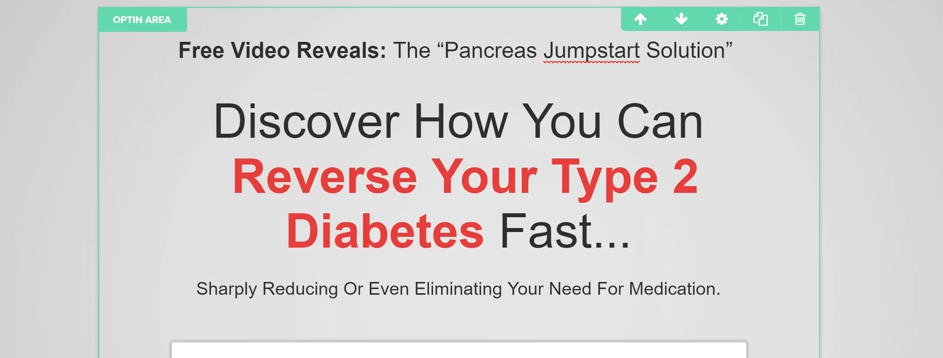
I cleaned up that copy and tweaked it, so it reads better:
“A Free Video Reveals The Pancreas Jumpstart Solution”
And for the subtitles, we’ve got, “Learn how you’ll be able to reverse your type two diabetes, sharply reducing or even eliminating your need for medication.”
Now, keep in mind that the reason for why you are taking and using this copy is because…
- You want awesome copy with a compelling headline
- You want text copy, not just a video (ideally we want a product that has both, so you won’t have to be responsible for creating one or both of them)
- You want to use this headline that you’ve created to grab audience attention, hopefully getting them to click on it
- This copy is extremely relevant to your product already, so it serves as a great starting point
We’ll go back to this copy in a bit, so don’t lose that notepad!
Get Your Free Clickfunnels Account Up and Running
If you’re already a Clickfunnels person, cool, if not, here’s a step by step to get you all setup fast and easy!
Full Disclosure:
I personally use Aweber and Clickfunnels, and I’m showing you exactly how to use them because these are great services. I’m also an affiliate for both of these services, so I do receive compensation when you click on one and sign up for it through the links on my post. If you use one or both of them, awesome. If not, no worries!
How to Get Started on Clickfunnels
1. Go to Clickfunnels and set up an account.
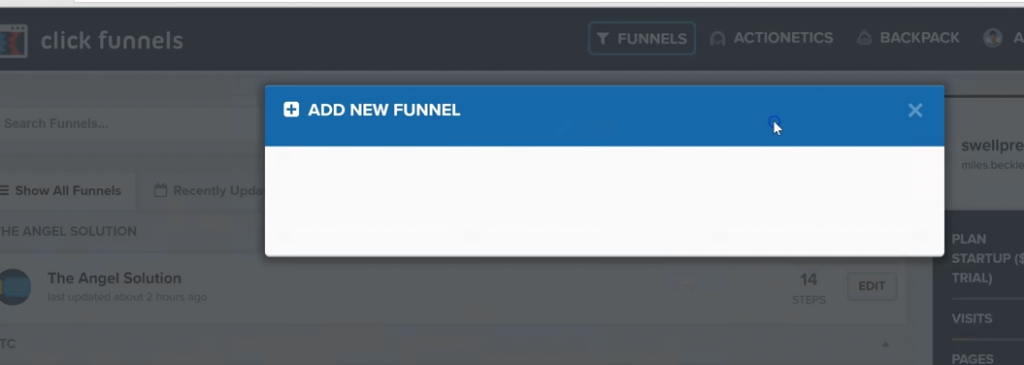
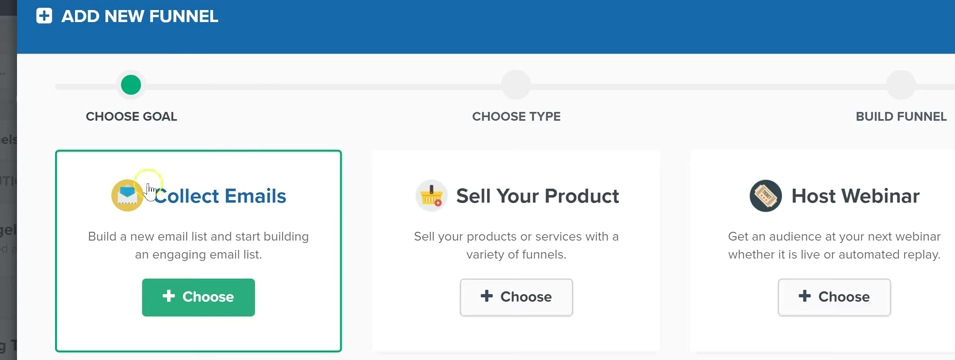
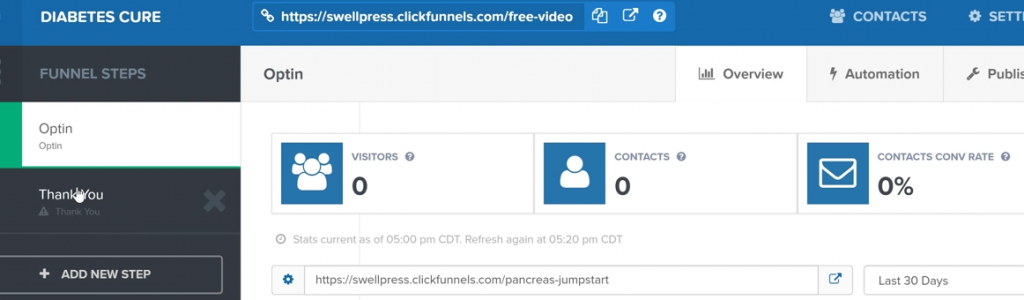
2. Once you are all set up, go to your dashboard and click “Funnels” on the main tab menu to go to that page… then click the “Add New Funnel” button.
3. The next box that pops up will ask you what kind of funnel you want to create. You will want to click whichever is appropriate for you… but for my funnel, I wanted the “Collect Emails” option, so that is what I clicked.
4. Name your new funnel.
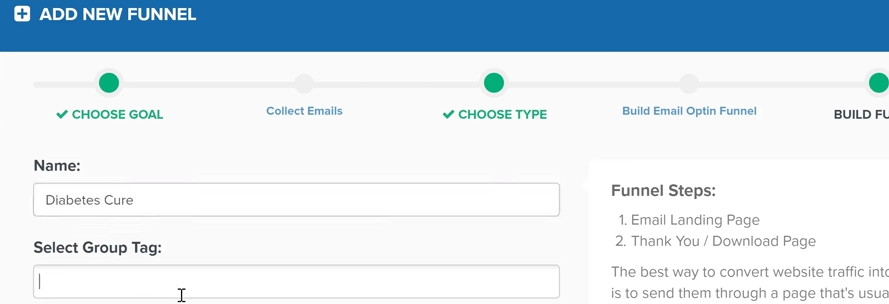
You may have to wait a moment or two for this step to complete.
What clickfunnels is doing is setting up the different pages within the funnel and linking them together in series.
Since this all gets done for you within Clickfunnels, you really only have to play with the text, the copy, and the look of your funnel.
There really is no simpler system than Clickfunnels. It is just super, super simple to set up a funnel with it that is not only beautiful, but that really works.
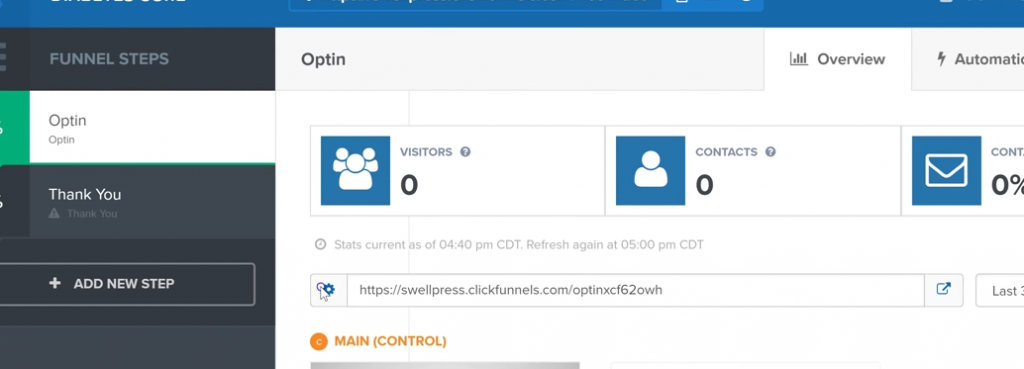
When getting ready to set up your own Clickfunnels affiliate funnel, you will have two vital steps to go through… creating the Opt-in page, and creating the Thank You page.
Let’s take a look at this process.
Create Your Opt-in Page
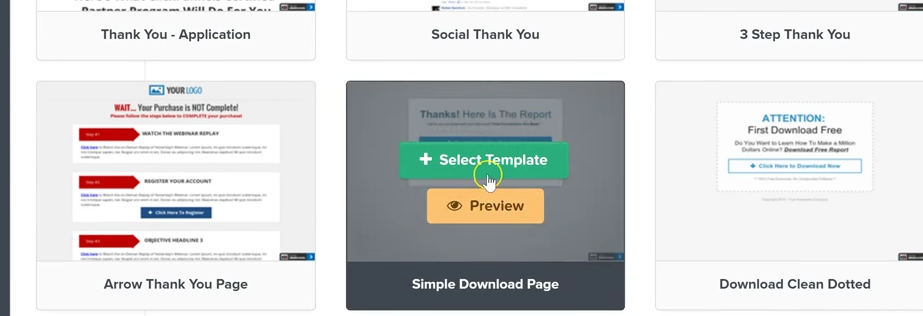
As soon as you get to this part of the process, you will see a bunch of templates to choose from.
You will need to choose one of them.
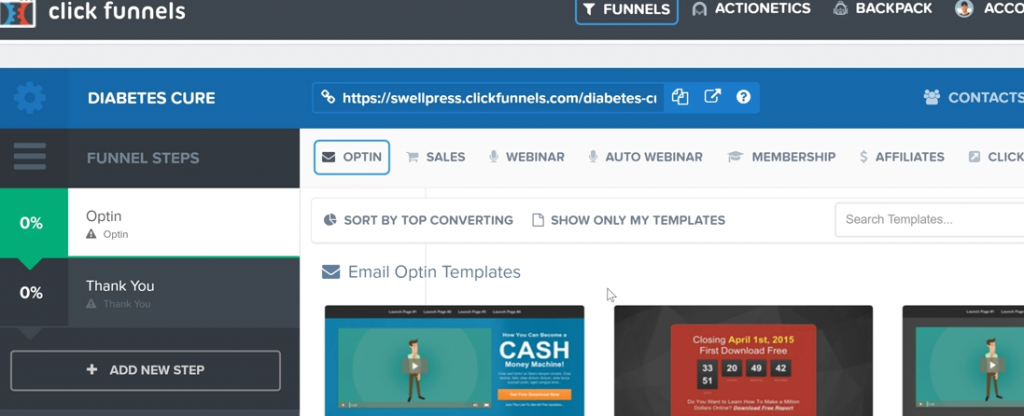
You can preview the templates, or you can select them. Once you select one, Clickfunnels will automatically create that page for you and add it to your funnel.
Two Crucial Things You Should Not Skip Doing on Clickfunnels
You do need to know a couple of things when setting up your opt-in page and Thank You page on Clickfunnels.
One, you need to set up your domain on the settings page.
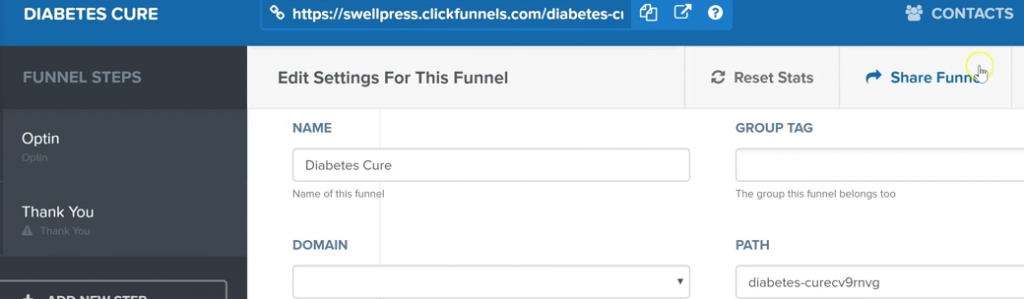
And two, under the “path” section, you need to type in “free video,” or whatever you feel that the best ‘path’ would be. There will already be something here, but it’s usually a good idea to change it.
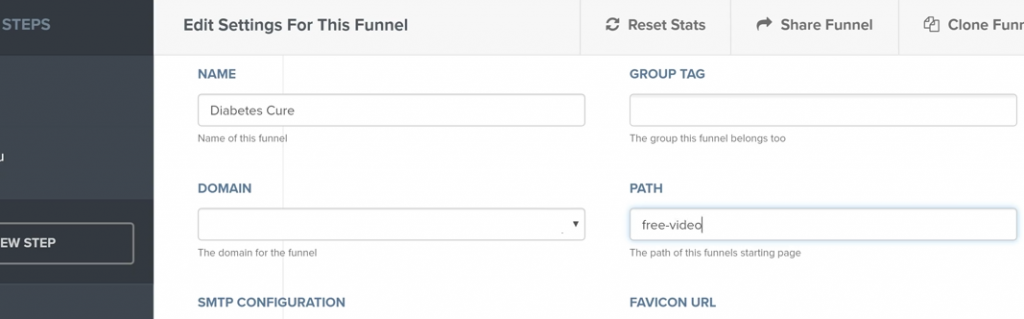
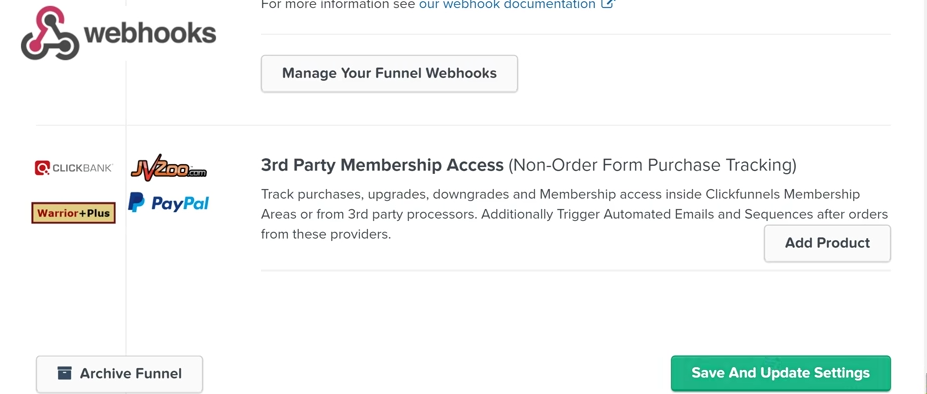
And of course, Save And Update Settings before moving on.
When you become a Clickfunnels user, you’ll want to be sure that you connect your actual domain name here. It’s really easy to do and they have it in the Support to help you out if you get stuck.
Lastly, set the URL level for the entire opt-in sequence, so you can create split tests. You really have to be split testing the correct way to make sure you’re funnel is doing as well as possible.
Check out my video on how to set up a split test on Clickfunnels down below:
[responsive_video type=’youtube’ hide_related=’1′ hide_logo=’0′ hide_controls=’0′ hide_title=’1′ hide_fullscreen=’0′ autoplay=’0′]https://www.youtube.com/watch?v=g52Kk8iOi2k[/responsive_video]
To finish setting up your Opt-in page, go to “Funnel Step Settings.”
Then, fill out the PATH section with something relevant to your video…
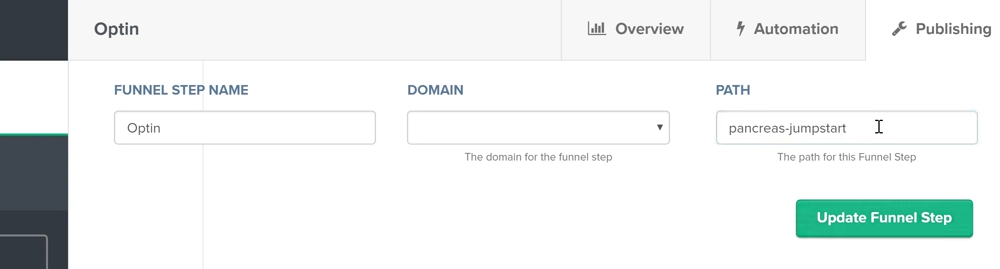
And then, fill in the FUNNEL STEP NAME. I chose to leave it on “Optin.” Then, click “Update Funnel Step” to finish this step.
This will be important when you get to the point where you will want to create split tests.
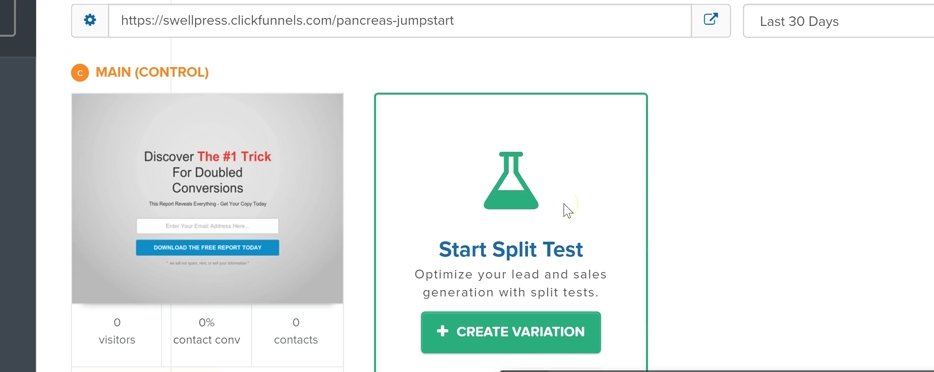
What you just created was the sub-URL for one variation of your page. When you create another variation with a different sub-URL, you will be able to split test them by having traffic from your main URL equally distributed between the two.
That is a super-easy thing to set up in Clickfunnels, and it is very important to make use of it so that you can figure out which version of your page performs better!
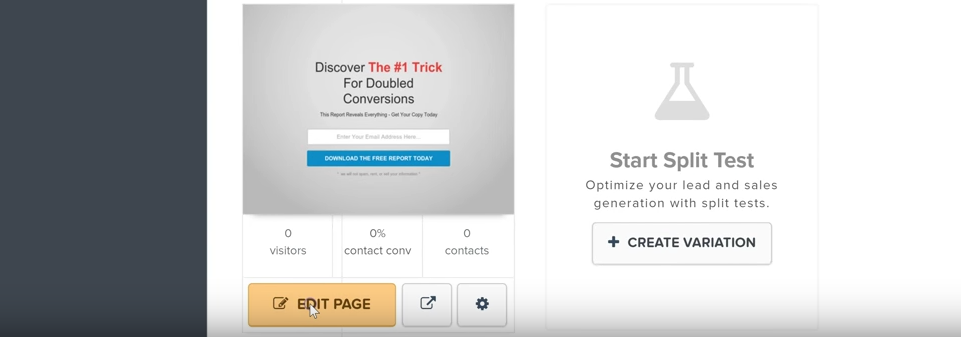
Edit Your Opt-In Page
To start editing your opt-in page, click on the “Edit Page” button located at the bottom of the funnel-creation screen you’re currently in.
Modify your opt-in page on the editor page.
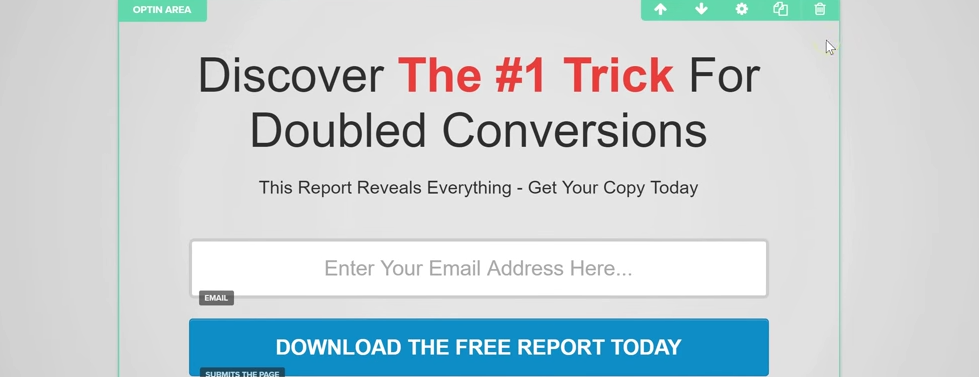
Notice the three levels within the editor when you hover over the elements on the page:
- Teal green is the outermost container. Don’t delete it or everything will be wiped out!
- The blue box is the next interior component.
- The gold or orange portion is a section or element where the title, subtitle, and all the other details are found.
You can modify all of these, duplicate them, and change the settings as you wish.
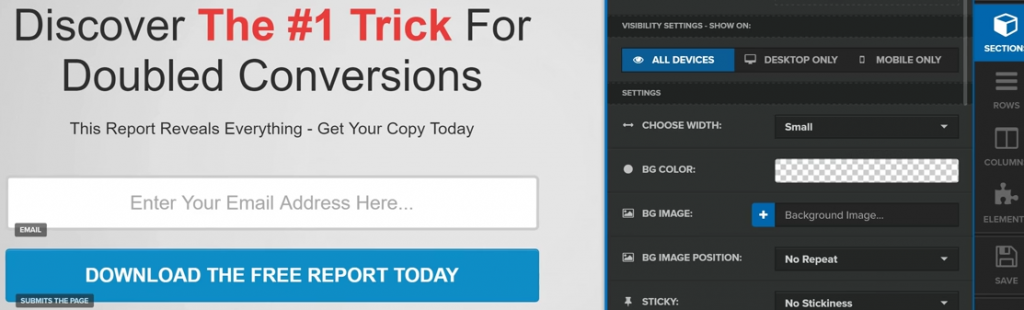
Say there’s a bunch of head room that makes your page look kind of awkward. When you click “Settings,” you can make tweaks to the padding and fix it.
Easy!
Play around with the settings section a bit, and add in that copy you created/modded earlier (that is still in your text doc…) and… Viola! You have your #baller opt-in page done!
Link Your Opt-In Page to Your Aweber Account
Tying this opt-in page into Aweber is actually pretty simple at this point, and can be done while you are still editing your opt-in page.
On the right-hand side of the screen, click “Email.”
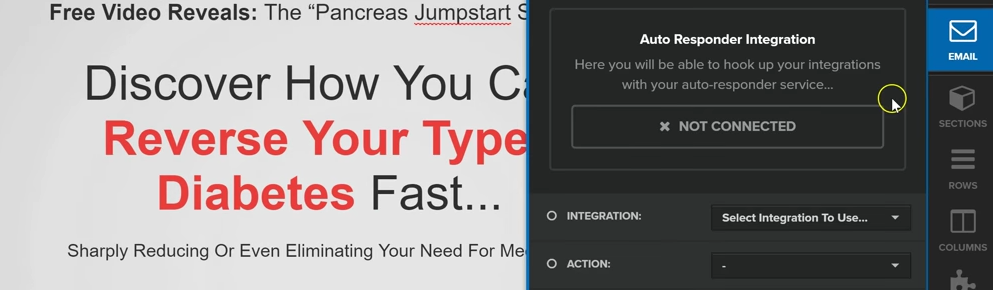
Click “Integration To Use” and select “Aweber” from the drop down menu.
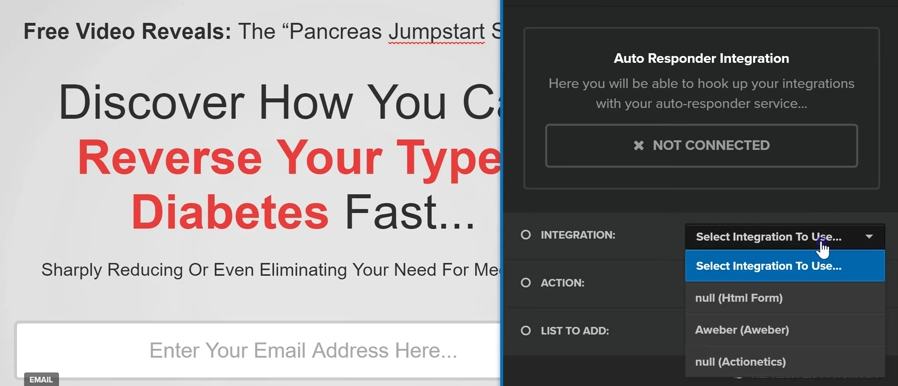
How to Link the Right Way
Here are the rest of the details I would want to input for my list:
- Integration: Aweber
- Action: Integrate Existing Form
- List to Add: Diabetes Cure
If you don’t see the right list to add quite yet, don’t worry! It can take up to an hour for their API to update.
So if it doesn’t show up, give it some time and check it again.
Once your list shows up, simply select that, and it should say “Connected.”
At this point, anytime someone submits their email address, it puts them on that list and it sends them the followup opt-in confirmation email from Aweber.
So just click “save” and you’re done!
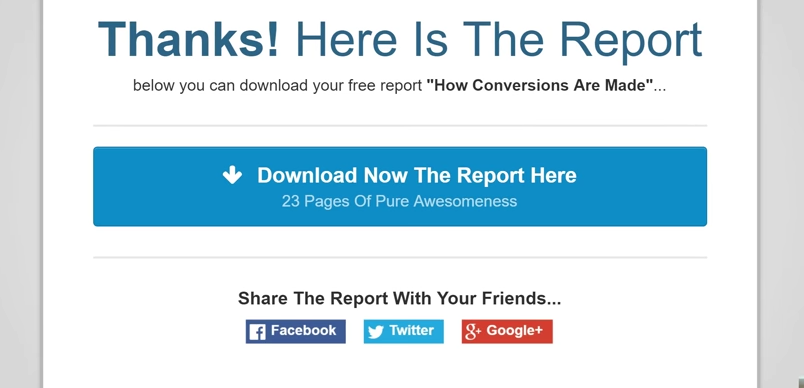
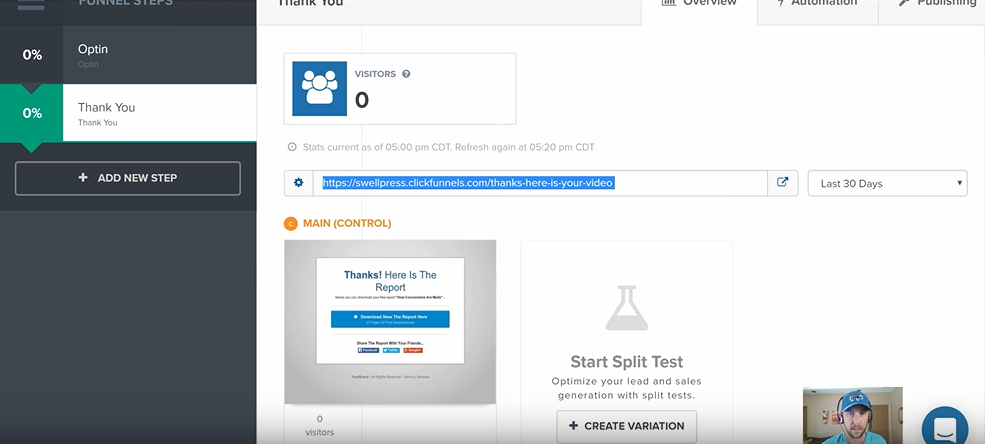
How to Create and Edit Your Thank You Page
To get to the ‘Thank You’ page and edit it, you need to back-out of the Opt-In editing page by clicking the little ‘back arrow’ located on the bottom-right-hand corner of the screen.
Your Thank You page is the first thing your leads will see after signing up through your opt-in page.
So you have to make it the best it can possibly be, and personalize it to your audience.
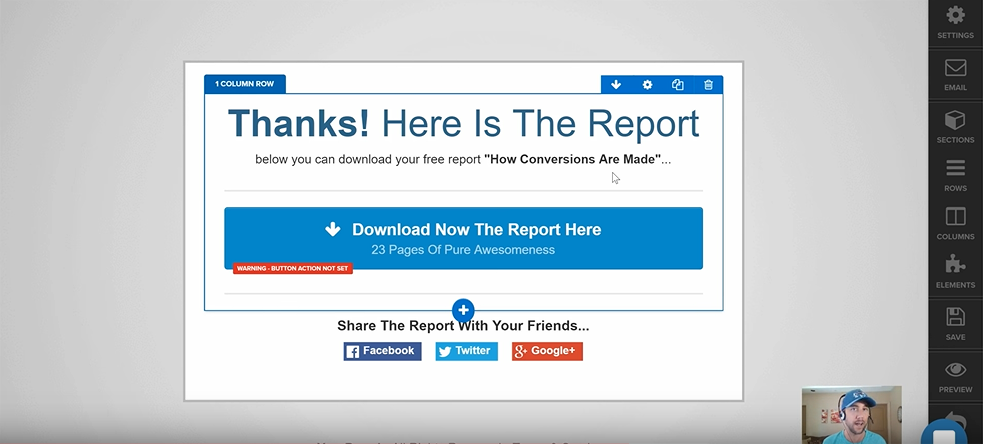
Create a Thank You Page
1. On your Clickfunnel dashboard, click “Thank You.”
2. Choose a simple download page that will match your opt-in page.
3. As you will notice, the URL it will try to give you will be a bit goofy… so you will want to change this.
Click the little “Settings” wheel on the left side of the URL bar, and then fill in the “Path” section. Type in something better and more personal, like… “thank-you-here-is-your-video.”

4. Next, click on “Update Funnel Step” to get your new URL. It will show up on the next page, in the URL bar sitting in the center of the screen.
5. Check to make sure that the URL takes you to the Thank You page by copy-and-pasting it into your browser’s URL bar, and then hit enter.
6. Now that you know that this thank-you page URL works, go back to Aweber.
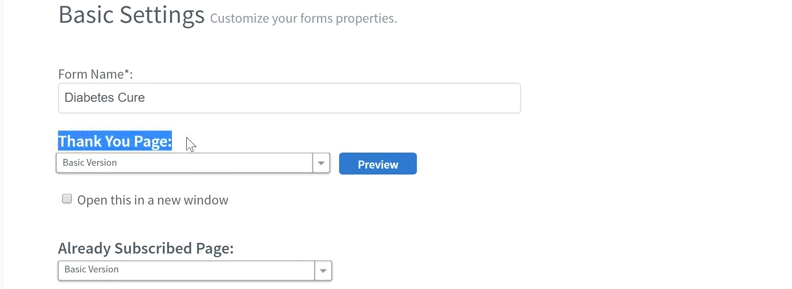
In the “Thank You Page” section, select “Custom Page” from the drop-down menu.
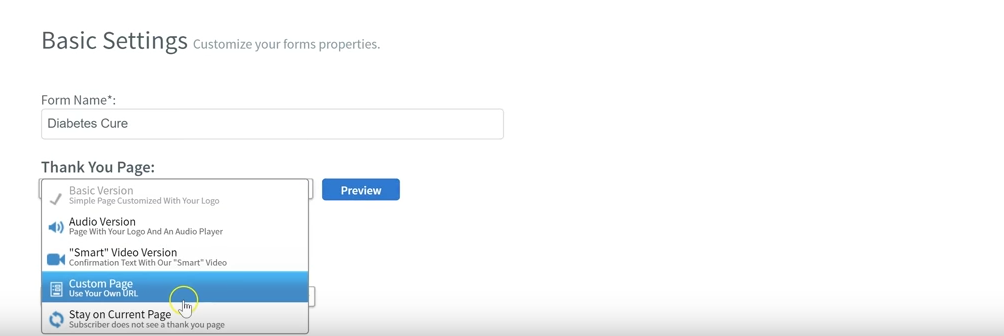
…and paste the URL into the space located directly under the “Thank You Page…”
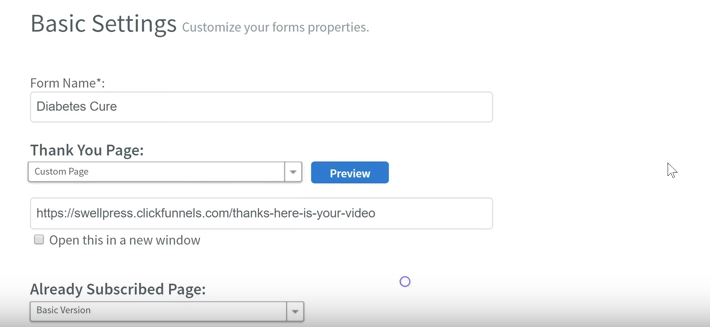
Then, click on the drop-down menu titled “Already Subscribed Page,” and select “Custom Page.”
…and then paste it again beneath the “Already Subscribed Page” section.

Then click “Save Your Form”.
Now you have your email set up… but let’s move on to finish editing the “Thank You” page.
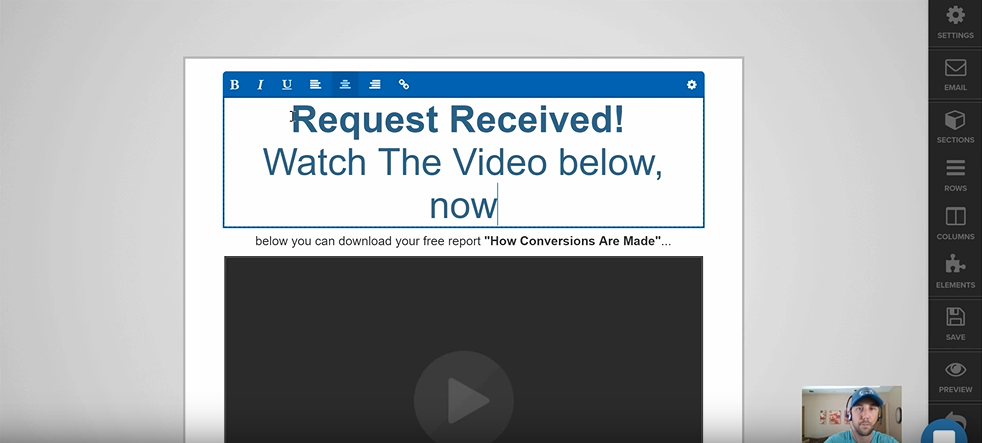
How to Edit Your Thank You Page
Once your Thank You page is setup, the next step is to spruce it up and make sure it communicates your message clearly.
To do this, go back to your Clickfunnels dashboard. Make sure that “Thank You” is clicked on the left side, and then scroll down and click on “Edit Page.” This will take you to your Thank You Page editor.
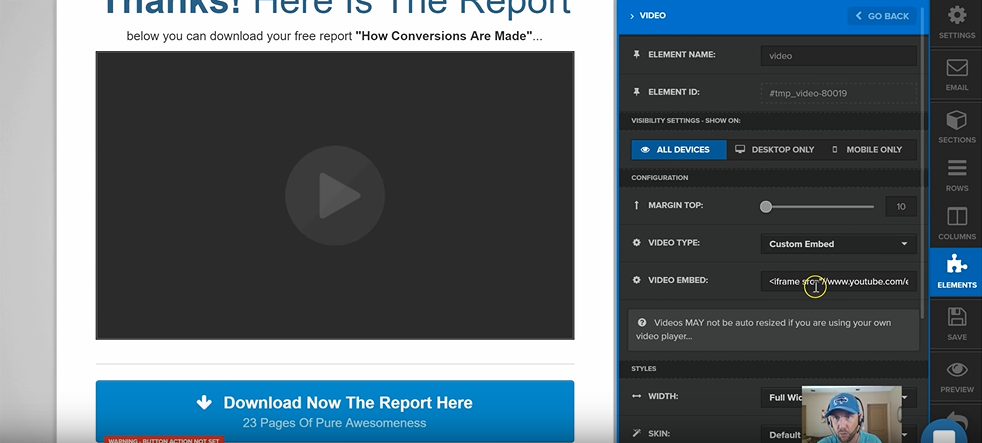
A video is always a great and powerful tool to deliver your message, so your audience will know exactly what to do next.
1. Create a personalized video on your Thank You page.
Here’s a sample script for your video. You will want it to say something like this…
“Hey, thank you for your interest in this free video. I’m really excited to share this information with you. But really quick, I wanted to introduce myself. My name is Miles Beckler, and (boom… here, enter your own personal story…) my father has type two diabetes. He tried everything, and it wasn’t until he learned about this secret that he was able to really manage, and even reverse his type two diabetes…
I’m excited to share with you through the video that we’re going to get to next. But I also wanted to introduce myself because I’m also going to share some other emails that are going to help you understand what you can do to better your health, to improve your situation, and to live a happier, longer, healthier life while managing your diabetes naturally…
So click the button below and watch the video now!”
This is just a quick example, but it is the basis for what kind of message you will want to deliver in your video.
And to add your video, once it is created, you will want to follow these steps…
2. Click the “+” button and double click “video” to add your video.


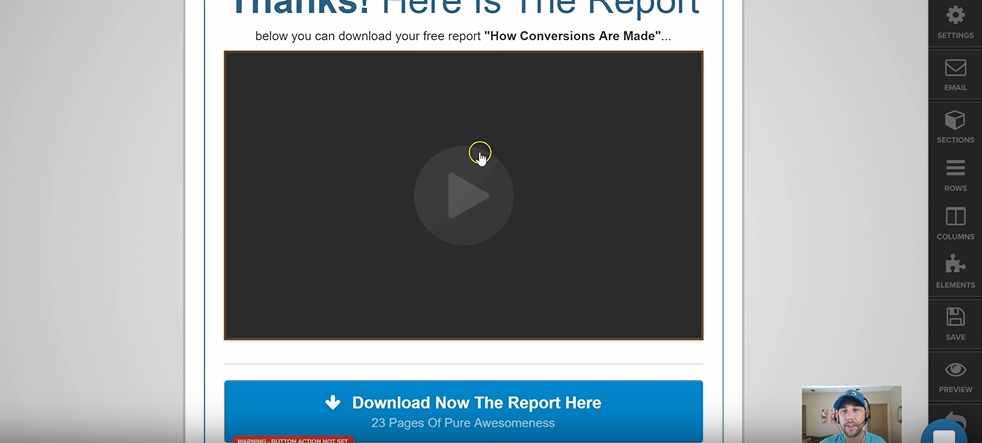
After you add the video player to the page, embedding your video is easy. You just click on the “Elements” button to the right-hand side of the screen, and a Video Embed section where you can input the YouTube URL of your video.
3. Video successfully embedded! 3. Video successfully embedded!
4. Next, you will want to add and customize the text on your Thank You page as well. This can be done using the easy Clickfunnels editor, exactly like you did it on the Opt-In page.
Now You’re Ready to Promote Your Product
With all the moving pieces created – your Opt-In page, your Thank You page, and your email list all setup, it’s time to take the next step… Promote your stuff!
Get Your Affiliate Code
1. Go back to clickbank and look for the product you’re promoting.
2. Click “promote.” You’ll see a pop up account nickname. Enter the details (nickname and tracking ID).
I would put MilesB for the account nickname (because it’s my name, LOL) and CF for the tracking ID. This way, when I make sales, I know the sales came from clickfunnels.
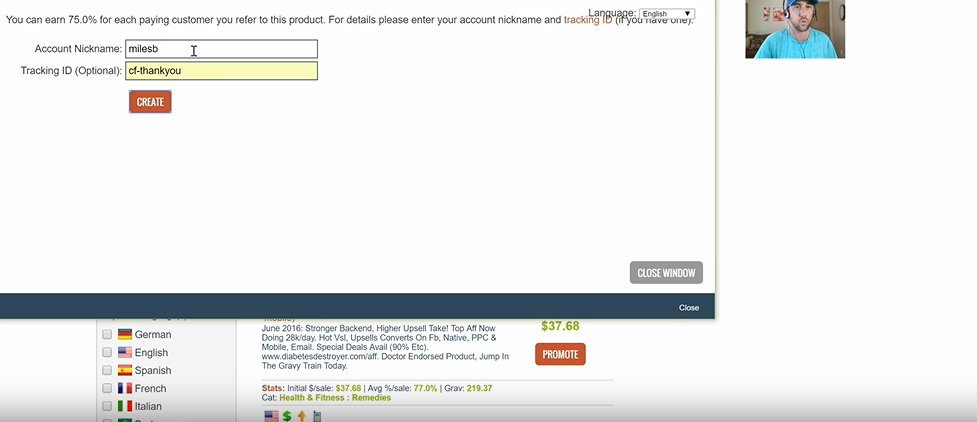
3. Once you’ve entered those details, click “create.”
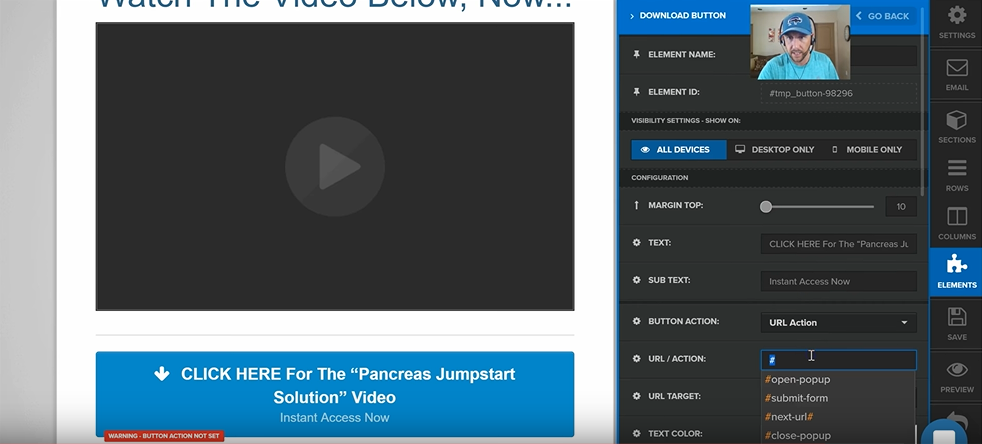
4. You’ll receive your Hoplink HTML code, and you should add this to your web page.
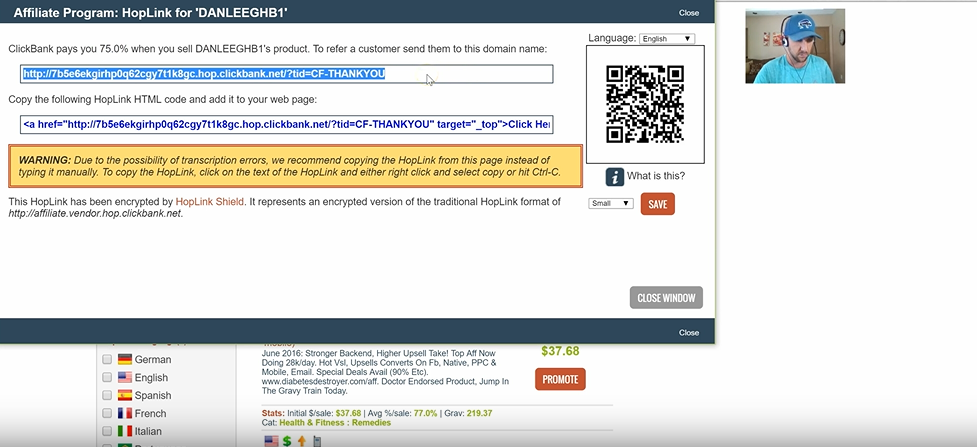
5. Go back to your Thank You page editor. In the “elements” section, you’ll find a section called “URL/Action”. Paste in your HopLink code and click “save.”
And there you have it – you’ve got your rocking opt-in page that’s all tied up with your Aweber!
Preview your pages to see if everything looks good and not glitchy, and with all these things said and done, there’s your affiliate funnel… done in minutes!
Just make sure that you actually test your funnel to make sure that it is working properly. You do not want to set up a funnel, look quickly at the preview, and then move on… only to fail to realize that there was something ‘broken’ going on with it!
So test your funnels… every time you create a new one, and every time you make any sort of change!
Turn Off ‘Confirmed Opt-In’
As a default setting, Aweber will have it to where people will need to ‘confirm’ that they want to receive your email before actually becoming subscribers.
You can either leave it like this or turn it off, but I actually am of the mind that you want to turn this off… and I will show you how to do that.
My reasoning for this is pretty simple. This funnel is not really designed to make you money on the front end, right? At least, not at first. It is really designed to help you sell enough to cover your ad spend and break even on costs.
The main purpose of this funnel is to build up your email list.
And in order to do that most effectively, you will want to make sure that as many people as possible are receiving your follow-up email sequence (this is called the autoresponder sequence).
So, just to reiterate…
“The goal is to break even, or to be cash-flow positive on the front-end, and the result is to obtain a massive email list.”
And once you build up your email list, and you start broadcasting and building up trust with your list, then you can start marketing to them directly via email… and that is insanely powerful.
That is where you will actually earn money with your funnel. That is the golden ticket!
So let’s talk about how to turn off the ‘confirmation opt-in’ in Aweber.
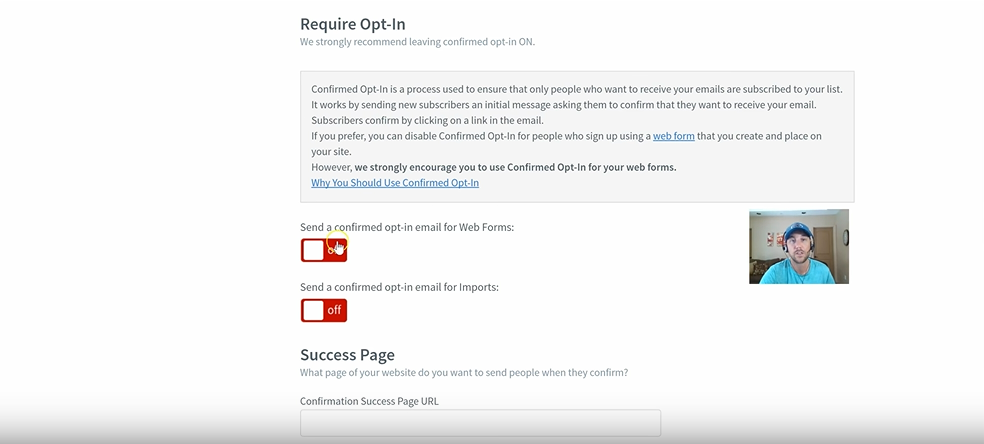
How To Turn Off ‘Confirmed Opt-In’ In Aweber
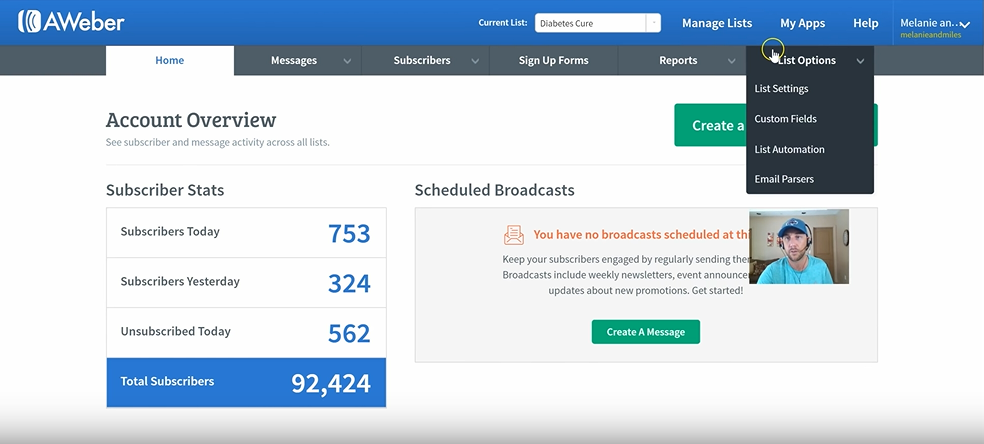
Step 1. From the Aweber dashboard, click on “List Options” on the toolbar, and go down in the drop-down menu to “List Settings.”
Step 2. Once this settings page opens up, head down to the “Confirmed Opt-In” button and click it.
Step 3. Once you are taken to the Confirmed Opt-In Settings page, scroll down to the bottom of the page. You will see a button labeled “Send a confirmed opt-in email for Web Forms.”
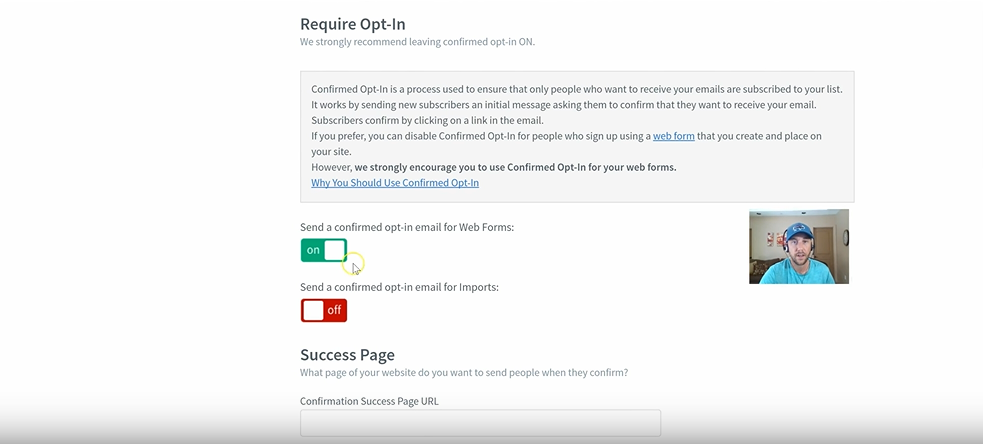
Step 4. Click this button to turn it off. Next, a dialogue box will pop up. It will look like this.

Once you confirm this choice in the dialogue box, the button will display as “Off,” meaning that you have disabled this setting.
Go Forth and Spread the Word
You have your social buttons down below your opt-in page, and you would want visitors to share this page with their friends.
Your primary source of traffic here will likely be Facebook ads… but your funnel should liquidate your ad spend and help you to build your list while breaking even on costs.
And that, my friend, is how you can keep the list growing, and your sales coming in.
Say you generate a 75% commission on the product we used as an example for this post, which is something like $35… Not bad, right?
Of course, commissions vary by product and niche… but the point here is that you can now drive traffic to this funnel, get opt-ins when people sign up for the free video, and even make money when people purchase the product!
It simply could not be any easier!
Conclusion
I hope you’ve enjoyed this step-by-step walk-through of how to build an affiliate marketing funnel in Clickfunnels.
I also hope that it has been super-helpful to you!
If you have any other questions about these steps, please go ahead and leave a comment below. I love to hear from you and answer questions, and am always stoked to keep the conversation going!
Thank you very much for your time! I do appreciate it very much.
Get out there and crush it, everyone!
I will see you on the next one!