If you want to make money online, you first need to understand how to do it. There are all kinds of ways to make a bit of cash using the internet… but if you aren’t using sales funnels, you are 100% going to leave the majority of the money you could be making on the table.
There are people who know a little bit about sales funnels… but who want you to think that you need to spend thousands of dollars to buy the software and courses to make them work.
The truth is actually quite different.
Funnels do not cost a lot of money. You don’t have to take out loans or buy templates from the gurus to make them work, either.
And to prove it, I’m going to give you my 7 step sales funnel checklist absolutely free… no payment required.
If you want to…
- Automate your online earnings
- Save money on advertising with a system that generates its own leads
- Build your email list with a system that liquidates your ad spend, virtually earning you leads and opt-ins for free
- Help your audience by giving them automated, easy user access to your products and/or services…
Then a sales funnel is absolutely the way to go.
Here is everything you need to know to get it up and going. This is the checklist I use to generate 6 figures a year… and you can do the exact same thing!
Sales Funnel Basics: What You Need To Have To Make It Work
Sales funnels are a lot like surgery. You are either doing it right, or you are not.
They are not open to interpretation, and you can’t just ‘happen into them’ by accident.
A sales funnel is a series of pages, designed in a specific way, to take your visitors down a specific sequence of steps, which will result in them opting-in to your offer and making sales along the way.
A sales funnel does not require you to…
- Have a website
- Have your own products
- Have a ton of traffic
- Spend a lot of money on ads
- Pay someone to build you a system
- Become a content-marketing mastermind
These are all very common misconceptions.
A sales funnel will, however, help you to earn actual, real, scalable income online.
But once again, you have to know how to build the right kind of funnel the right way.
And the only way to know if a funnel is working is to track the results with hard data.
And the only way to get this data is through split testing.
But even proper split testing requires you to build your funnel correctly. If you don’t, you won’t be fully optimizing your effort and ad spend.
So what do you need to make your funnel work right?
Here is my 7 step sales funnel checklist to answer that question.
Step 1: You Need A Rockin Opt-In Page
Regardless of which mechanisms you use to bring new cold leads into your funnel, you are going to need an Opt-In page to get things started.
Your opt-in page is a landing page that is essentially offering a new big idea to your audience, in the form of a free offer, in exchange for them signing up to your email list.
The offer could be for a free ebook, a free report, a free course, a free video series, a free MP3, etc.
Of course, you will ‘sell’ this offer with professional sales copy, some great headlines, and maybe even some bullet points. But the general idea here is to introduce yourself to this new cold traffic visitor, let them know what you are about, let them know that you can help them, and convince them that the first step to solving their problem is to opt-in to your free offer.
New Big Idea & New Lead Magnet

You will need to portray your free offer as a ‘new big idea’ to sell it to this cold traffic.
You want these potential new customers to be so interested in what you are offering, that they immediately sign up for the free thing in exchange for their email address.
This is your lead magnet.
A lead magnet is basically an incentive (usually a free thing) that you use to get visitors to opt-in and give you their email address.
This is also how you build your email list… so you really want to make sure that you do your best to get as many conversions on this page as possible.
How do you do that? By split testing.
Split Test!

Once you design a landing/opt-in page and start running Facebook ad traffic to it, you will want to set up a split test and try out a different landing page at the same time.
What is a split test, you might ask?
A split test is essentially a method for carrying out A/B tests that are not only controlled, but also randomized… to give you hard, accurate data telling you exactly which version of the ‘thing’ you are testing (landing page, checkout page, Facebook ad, etc.) works better.
After split testing, you will know which version performs better… and the idea behind split testing is to use it to constantly improve the results you get from your sales funnels.
When it comes to your landing page, split testing is really important. But when you perform split tests, you generally only want to tweak one element of the page at a time.
You do this to find out which one does better. Try out different headlines, different sales copy, a different layout, different bullet points, etc.
Once you have a winner, adopt that as your default, but immediately start split-testing again with something new.
Never stop split testing! This is how you get your conversion rate to a higher percentage, which means more opt-ins… and ultimately, more sales.
Facebook & Google Tracking

You also want to make sure that you have your Facebook and Google tracking installed correctly, so that you can analyze your progress, find out what your conversion rate is, and feed all of that data back to Facebook.
If you don’t feed this data back to Facebook, or use it in Analytics, how will you be able to analyze it to see how well the funnel is actually performing?
This is a pretty nerdy, complicated process… but you can watch this video to learn a lot more about how to do it.
[responsive_video type=’youtube’ hide_related=’1′ hide_logo=’0′ hide_controls=’0′ hide_title=’1′ hide_fullscreen=’0′ autoplay=’0′]https://www.youtube.com/watch?v=jOWKaZ3fzx4[/responsive_video]
Step 2: Follow Up With Your Autoresponder Sequence
You need an autoresponder email system that will automatically follow-up with people when they sign up for your free offer.
Whenever one of your cold leads opts-in on your landing page, and signs up for the free offer in exchange for their email address, two things will happen.
First, the ‘free item’ will be sent off to them… which is part of the ‘autoresponder’ sequence that will occur. Second, they will be added to your email list… which is a crucial part of why a funnel is so important, and why it is so important to build it correctly.
The autoresponder sequence is basically a sequence of 3 to 10 emails, coming at a rate of one email per day, that follows up with them after they opt-in for your free offer.
These emails deliver the free offer, introduce your business to this new ‘list member,’ and start the process of building trust. The emails deliver value, and communicate how you are the best person in the world to help them solve the ‘big problem’ they are having.
List/Form/Tag
I use tags in my auto responders so that I can identify which individuals in my list came through which particular forms or opt-in pages.
And of course, every person who signs up for the free offer is not only sent an autoresponder sequence, but is also added to my broadcast list.
Follow Up And Broadcast List

You need to send out not only follow up emails, but also a regular broadcast list!
Follow-up emails are sent out as part of the autoresponder sequence. But after the follow-up sequence has been completed, these new list members are then put on your broadcast list.
The people on this list should receive emails almost every day. These emails should be loaded with value to help your members with anything they might need pertaining to your niche.
This is how you continue to build trust and value.
But this is also where you stand to make the majority of your money in digital marketing… because you will also use this list to direct-market new products to your members.
Step 3: Crush It With A Functional, User-Friendly Delivery Page
You need a functional, user-friendly delivery page to deliver your free item to the user.
This ‘delivery page’ is the page that actually delivers the free item you offered on your opt-in page.
This is Basically A Completed Lead Magnet That Will Be Hosted Elsewhere
You can host this free offer on your website, but the ideal thing to do is to host it elsewhere.
When figuring out how to get this vital piece of the puzzle into the hands of your new list members, keep in mind that the most important part of the delivery page is how well it works for the user.
You want simple, simple, simple! You don’t want your users to have to jump through hoops to get the free thing they signed up for.
The Lead Magnet Delivery Is Tied Into Email #1
The delivery page should be tied into the first autoresponder email, though you will not actually deliver it through the email. Instead, you will deliver it via a third-party platform that supports the type of media you are delivering.
Should You Include Offers On This Page?
Part of this funnel includes showing a one-time-offer after the user opts-in. But some people also put offers on the delivery page when the free item is delivered.
This could be a great deal on a product that really enhances the free item they got, etc. It is ultimately up to you to decide if you want to have another offer tied to your delivery page… but it is an option.
Step 4: Make Your First Sale With A One Time Offer

You are going to need a One-Time-Offer page built into your funnel.
Here is how it works.
When the user signs up for your free offer, you then take them to a page that basically says something like this.
“Your free item is on its way and will arrive in about 5 minutes! In the meantime, check out this video to learn how to do even more to solve your problem…”
I use a video on this page to really sell the one-time-offer, which is truly a one time offer for a product that will complement the free item, but offered at a very discounted price.
The OTO on my current funnel is running a deal that offers 43% off on a product that just really enhances what is already being delivered, to make the free offer even better.
You want to sell it like this…
“Yes, that free item will start you down the path… but this one-time-offer is definitely what you want if you want to start kicking this solution into overdrive right now!”
This is a very important part of the funnel, because selling the OTOs and upsells is what pays you for your Facebook ad spend, and gives you the ability to kick money back into Facebook for more ads to keep the funnel going… essentially allowing you to build your email list without spending any additional money on advertising.
Make Sure To Split Test!
Split testing is incredibly important at all levels of the sales funnel game. You MUST check this off of your list if you really want to succeed!
You are going to be split testing virtually everything, to find the best version of what works and what doesn’t work.
Split Test The Products
You can split test different products in your one-time-offer to see which offer appeals more to the kind of cold-traffic you tend to bring in.
Split Test The Pricing
You can also split test different price points. Does lowering the price by a few dollars result in more sales? Do you do as well with a $97 product as you do with a $17 product?
These are answers that you will only get once you’ve performed split tests to discover the data.
Step 5: Close The Deal With A Smooth, User-Friendly Checkout & Delivery
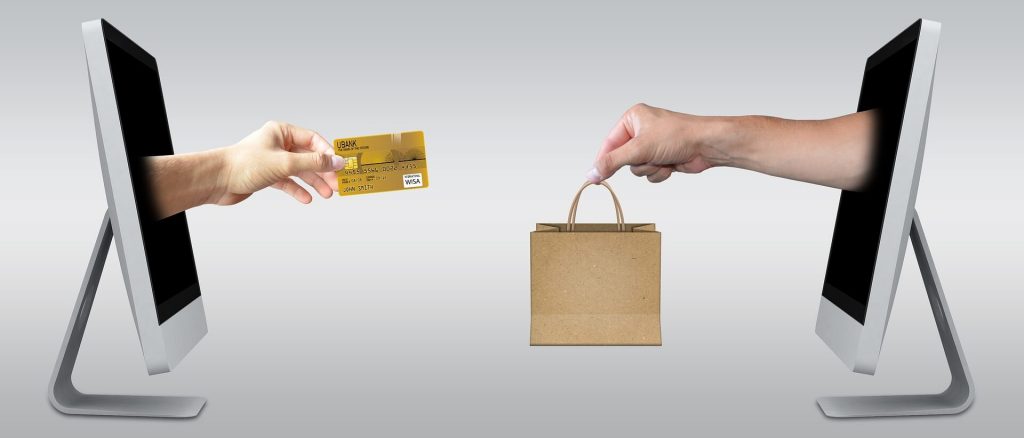
You will need a checkout and delivery page for your one-time-offer… so let’s talk about that for a moment.
Your customer has…
- Opted-in to get your free item
- Arrived at the one-time-offer
- Clicked on the button to purchase this item
At this point, the customer will reach a checkout page, where they will pull out their card to pay. You should be split testing this checkout page religiously, because A LOT of sales are lost here!
People get to the page, get cold feet, and end up not making the purchase.
So split testing your checkout page, to find the best way to reaffirm to your customers that they need this product to solve their problem, is HUGE.
Once they punch in their credit card number, they will be taken to a one-click upsell.
Whether or not they choose to add the upsell, they will then be taken to the delivery page.
The most important thing about this delivery page, once again, is that it needs to be incredibly simple and easy for your users.
They just paid money for products, and you need to reinforce that newfound trust by delivering not only what you promised, but also by making the process as user-friendly as possible for your customers!
If you do this really well, you will build a lot of trust and really earn a lot of points with this person who just bought from you. And this means that you are increasing the chances that they will come back and buy from you again in the future.
Step 6: Make Another Sale With A One-Click Upsell

You also need a one click upsell page on your sales funnel.
This page comes up after the one-time-offer, while the transaction is still open… so after your customer has typed in their credit card information, but before the transaction finalizes and the delivery page opens.
Here, they are offered yet another product that will even further enhance their experience.
You need to be split testing this page as well… because you want to make as many upsells as possible. You can split test both with different products, and with different prices.
Once again, as with the one-time-offer, the more upsells you sell, the more money you can take and put back into Facebook ads.
If they skip this offer, the transaction with finalize and they will just be charged for the OTO. If they opt for the upsell, awesome! They will be charged for both, and both will be delivered as promised!
Step 7: Facebook Ads, Pixels, And Custom Conversions
The final step here is to make sure that your Google analytics and Facebook ad campaign are set up correctly to make your funnel function as it is supposed to.
Make Sure That FB Tracks Conversions
You want Facebook and Google to work together to understand what your conversion goals are, because you want to feed that data back to Facebook when you do make conversions.
This will help Facebook to deliver more relevant traffic to you in the future… which will make your funnels more and more effective over time.
You will also want to use a retargeting pixel from Facebook to retarget users who made it to your opt-in page, but failed to opt-in.
You want to show these users a different set of ads, in an attempt to get them back to your opt-in page to sign up for that free offer.
I am currently showing a longer-form ad to these visitors, giving them 3 reasons why they need to go sign up for my free offer, etc.
Long Copy Vs. Short Copy Ads, Stock Images Vs. Branded Images, etc.

You also want to be split testing your Facebook ads, and this includes experimenting with long and short copy. In some cases, you will find that longer copy simply works better… and in some cases, you will find that shorter copy is the ‘magic ingredient.’
But there is no way to know until you split test… so make sure to do plenty of split testing, to figure out what works better and what gets you more clicks, opt-ins, and sales.
The same thing can be said of stock images vs. branded images. You need to split test not only your Facebook ad headlines and sales copy, but also the images that you use with your ad.
Are your images stock images? Do they evoke emotion for the viewer? Are they inspiring the kind of action you need to inspire in your visitors to get the conversions you need?
The only way to know what will work better is to split test.
A Final Sales Funnel Checklist
Alright. At this point, you’ve literally learned everything you need to know to go out and crush it with your own sales funnel.
But just to make sure you don’t forget anything, here is a final checklist. It contains the 7 major steps you need to check off, along with some extra steps that you also want to make sure to incorporate.
Here is the checklist you need to make sure that your sales funnel will crush, convert, and sell… over and over again!
- Opt-In page
- Set up Google and Facebook tracking
- Autoresponder sequence emails
- Tag your emails so that you know where conversions are coming from
- Ad new list members to your broadcast list after the autoresponder sequence is complete
- Delivery page
- One time offer page
- Checkout and delivery
- One click upsell
- Facebook retargeting pixel on visitors who don’t opt-in
- Spit test everything, over and over again
- Put your earnings back into Facebook ads, to liquidate your ad spend and kick off another round of leads
Once you make it through this checklist and have mastered all of the different parts of this funnel, you will be well on your way to making money online.
One of the main things to keep in mind is that you need all of this to be automated. That is the whole point of the funnel. If everything is automated, then you won’t need to babysit it… which gives you the opportunity to scale and earn anytime, even in your sleep!
Of course, also keep in mind that the main point of this funnel is to gather email list members and break even on Facebook ad-spend.
All of the money you make with this funnel will get put right back into your Facebook ads.
And that is how you create a self-liquidating funnel that covers its own advertising costs… essentially giving you the ability to build an email list automatically, without spending any extra money out of pocket.
Conclusion
Hopefully, this 7 step sales funnel checklist has given you everything you need to start crushing it online with conversions, opt-ins, and sales.
But if it hasn’t, feel free to hit me up in the comments and let me know what else you need!
I love to answer questions and keep the conversation alive, so drop your questions/comments/queries below.
Have you been using a funnel? Have you ever tried this particular funnel design?
If so, let me know what your experiences were like.
Thanks for reading!
And as always, I’ll see you on the next one!

